Thursday, January 13, 2011

Slow Cooker Roast

 This recipe could be used for a roast or any other cut of meat (ex. London Broil).  The great thing about this recipe is its flexibility too!  The recipe can be amended to suit a specific taste and can be spiced up to a desired flavor.  Cooking meat in a crock pot is almost sure to guarantee a moist and tender entrée - as long as you ensure that your slow cooker has enough liquid.  I mentioned it in an earlier blog post- but you must be sure to use a lot of liquid when using a slow cooker.  (You can’t have too much- so aim high!)

This recipe is for a small roast to serve 2-3 people.  You can use a larger slow cooker and a larger cut of meat.  Just add more potatoes and vegetables (which can also be customized to suit your specific taste).


Ingredients
·         Roast or Cut of Meat
·         4-6 Potatoes
·         1 c. Baby Carrots (or you can use peeled, cut carrots)
·         ½ Onion - sliced
·         1 Pkg Dry Onion Soup Mix
·         1 Pkg Dry Ranch Dip Mix
·         ½ can Coke (you can use Diet Coke or Coke Zero)
·         ½ can Chicken stock

Instructions
·  Peel vegetables and potatoes (where applicable).
·  Place all vegetables (except onions) in the bottom of the slow cooker.
·  Place roast (or other meat cut) on top of vegetables.  *meat can be frozen or thawed; the only difference is the cooking time would be lengthened for frozen meat*
·  Pour can of coke over roast (use ½ can if making a smaller roast)
·  Pour can of chicken stock over roast (use ½ can if making smaller roast)
·  Pour package of dry Onion Soup Mix and Dry Ranch Dip Mix over the top of the roast
·  Place sliced onion over the top of the meat
·  Cover
·  Cook for 6-8 hours, or until the thickest part of the meat reads 145 on a meat thermometer

When you are done you will note that your cut of meat is very tender and will almost fall apart.  At that moment you will know why you used a slow cooker and will probably begin to plan your next meal!
Enjoy!


Sunday, January 2, 2011

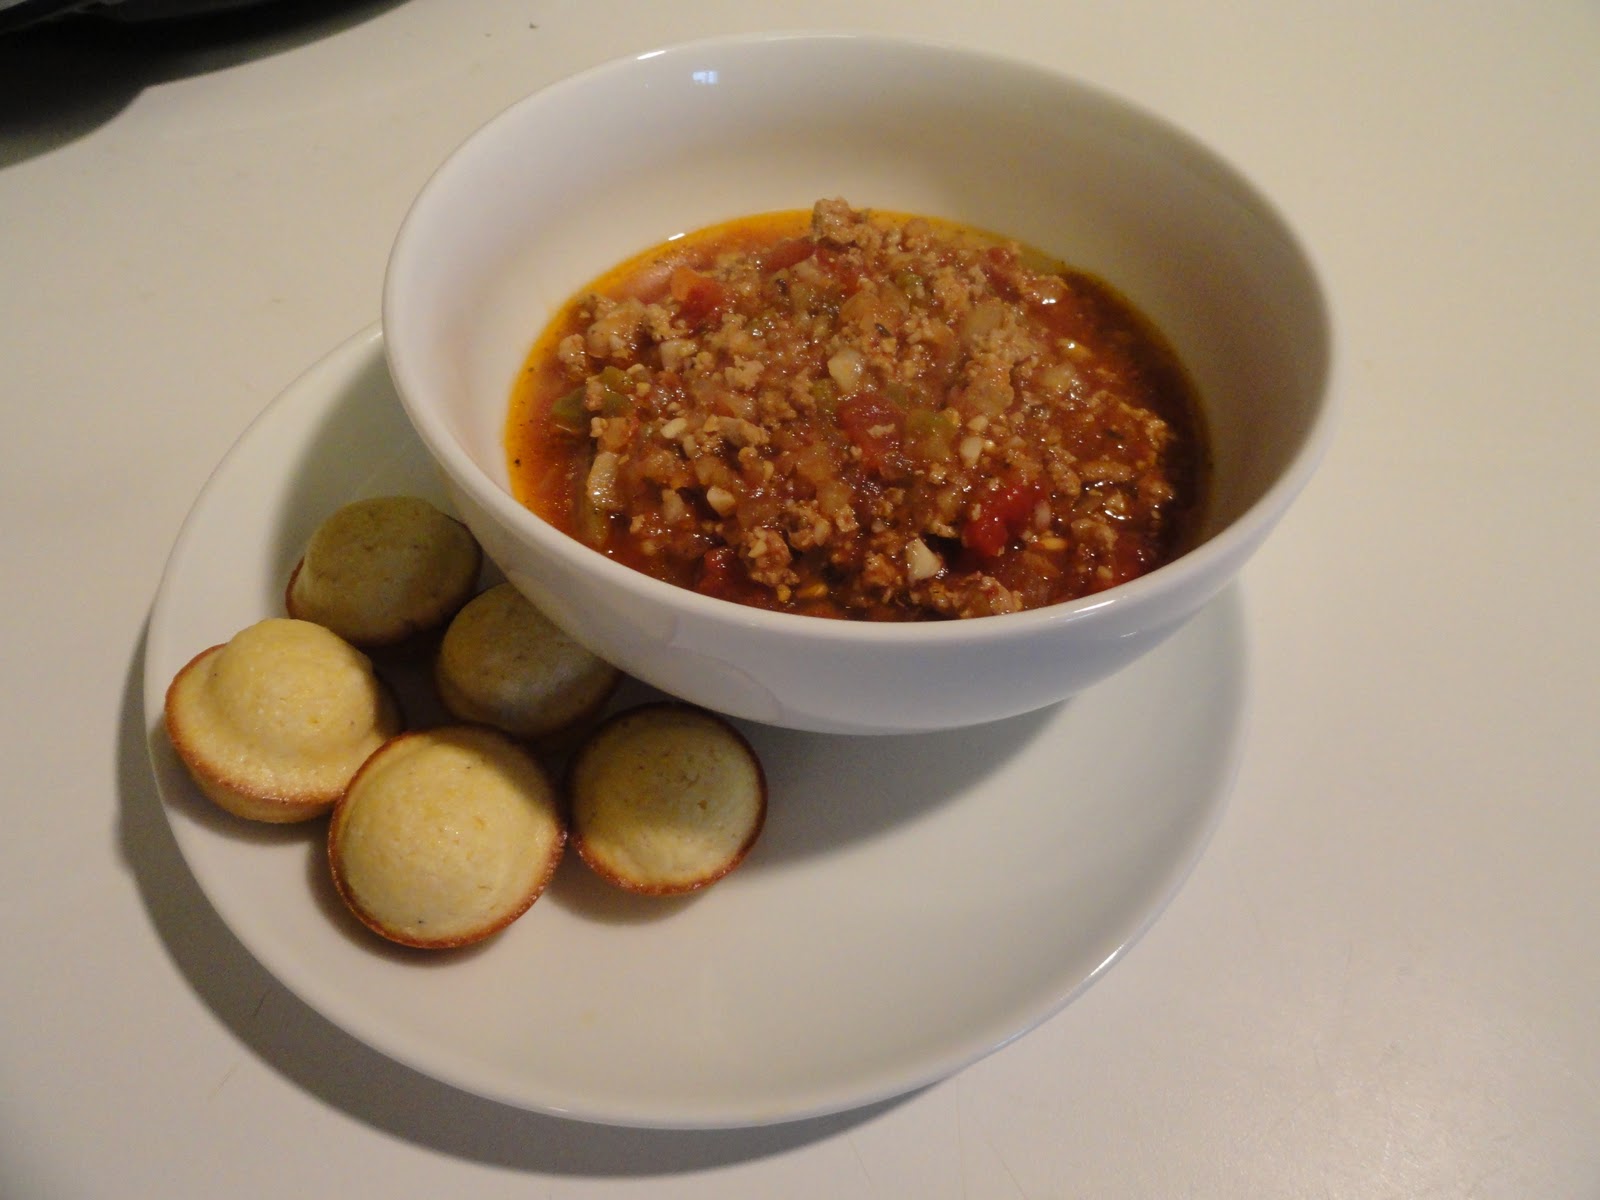
Slow Cooker Turkey Chili


I love chili in the winter, and I really enjoy a good turkey chili.  This is a very simple turkey chili recipe that will be sure to wow your friends, family, or dinner guests.
In just minutes you can toss all of these items in the slow cooker and in a few hours you have a delicious meal.


Ingredients
·         2 chopped onions
·         4 chopped garlic cloves
·         1 chopped green pepper
·         ¼ c. olive oil
·         2 cans stewed tomatoes
·         1 can diced tomatoes
·         1 small can tomato paste
·         1 can chicken stock
·         2 T. chili powder
·         1 T. cumin
·         1 t. oregano
·         1 t. black pepper
·         2 lbs. ground turkey - cooked
·         ¼ c. shredded cheese

Instructions
·  In a medium or large slow cooker, mix stewed tomatoes, diced tomatoes, tomato paste, chicken stock, and olive oil.
·  Chop onions
·  Chop garlic
·  Chop green pepper
·  Add chopped vegetables to the slow cooker
·  Brown 2 lbs of ground turkey and add to slow cooker
·  Add cumin, oregano, pepper, chili powder, and shredded cheese
·  Mix slow cooker together
·  Allow to cook on medium-high for 4 hours.  (you could cook it on low all day if you want - the longer you cook the more intense the flavors get!)


I always serve my chili with corn bread!
Top chili with sour crème and/or shredded cheese too!
Chili keeps for several days in the fridge or can be frozen in freezer bags for many months!


Saturday, January 1, 2011

Slow Cooker Equipment

If there is one thing that every kitchen needs it is a slow cooker.  I actually think that every kitchen could use two, three, or four slow cookers!  Once you learn how to use your slow cooker to your advantage, you will see how great your meals can taste and how easy it is prepare a meal!

A little background…
Many people call a slow cooker a crock pot.  Crock-Pot is actually a trade marked brand in the US.  Coincidentally Slo-Cooker is a trade marked brand in the UK.

For the month of January I will be posting recipes that are made in your slow cooker.
Families are busier and busier, and while January isn’t a historically busy month - people are still decompressing from all of the holiday gatherings and engagements.
If you don’t have a slow cooker - RUN DON’T WALK!
One brand or another is on sale every week at local discount retailers like Target and Bed Bath and Beyond.  You don’t need to be too picky- just pick a size that isn’t too small!

I use three different sizes regularly.
I have a large slow cooker that is 5 quarts.  (5 or 6 quarts is a large size, but is one of the most versatile sizes that you can have.)


I also have another slow cooker that is 3 quarts.  This is great for small appetizers, small meals, or desserts.  (Yes!  You can make desserts in a slow cooker!  I will have at least one of those on here this month.)


I also have a small 1 quart slow cooker.  This is perfect for one thing - DIP.  I will be posting at least one slow cooker cheese dip recipe.


If there was one tip to remember about using a slow cooker it would be this…
Cardinal Rule of Slow Cooking:
Use lots of liquid.  All the slow cooker recipes that I will put on the site are tried and true.  Be sure that if you are going to alter any of the recipes that you don’t skimp on any of the liquid.  In order to not scorch your food (and your equipment) you must make sure that there is enough moisture in your slow cooker.

Monday, December 13, 2010

Candy Week Entry #3 - Fudge

Ever since I was a kid, this was one of my MUST HAVE items at Christmas.  Mom always made sure to have a batch (or two!) of fudge on hand!  Over the years I have made many different versions of fudge recipes - but my favorite always comes back to the creamy delicious version with marshmallow crème.  (Some also call it fantasy fudge.)

The fudge is quick, easy, virtually foolproof, and VERY delicious.
Fudge keeps for a while, so make this one of the first items you bake this holiday season, and then you can snack on it a little each day.
(you had better make two batches - you will be glad you had extras!)


Ingredients
·         3 c. sugar
·         ¾ c. butter (1 ½ sticks)
·         1 small can (5 oz.) evaporated milk
·         1 bag semi sweet chocolate chips
·         1 jar (7 oz) marshmallow crème
·         1 t. vanilla

Instructions
·         In a large saucepan, melt butter on medium heat.
·         Stir in sugar, and evaporated.  Mix well.
·         Bring mixture to a boil and continue stirring until the candy thermometer reads 240 degrees.
**always continuously stir**
·         Once at 240, remove from heat.
·         Immediately stir in chocolate chips until melted.
·         Immediately stir in marshmallow crème.
·         Add vanilla.
·         Pour into parchment lined pan.
·         Chill for 2-3 hours.
·         Cut fudge into small squares.


Fudge is best kept chilled until you are ready to display it for eating.

Sunday, December 12, 2010

Candy Week Entry #2 - Homemade Caramels


Caramel.  A beige to dark brown confection made by heating a variety of sugars.  Some have suggested its origin in the Arabic phrase "kurat al milh" which means “ball of sweet salt”.

I AGREE!
The buttery richness of fresh homemade caramels are perfect for any time of the year.  This treat is rich, so you don’t want to have them around every day - but for special occasions I would suggest whipping up a batch.  The holidays are the perfect time for you to try making these yourself!


Ingredients
·         1 c. butter
·         2 ¼ c. brown sugar
·         Pinch of salt
·         1 c. light corn syrup
·         One 15 oz. can sweetened condensed milk
·         1 t. vanilla

Instructions
-In a large saucepan, melt butter on medium heat.
-Stir in brown sugar, salt, and corn syrup.  Mix well.
-Add sweetened condensed milk (and candy thermometer).
-Turn up heat, stir constantly, and bring mixture to 248 degrees.
-Stir continuously, but avoid scraping the bottom of your pan.  **Watch closely- if you get past 250 you may ruin your caramels!**
-Remove from heat and stir in vanilla.
-Pour into parchment lined pan.
-Let set at room temperature for 6-8 hours.
-Cut caramels into desired sizes.  Caramels are perfect for dunking in chocolate too!
-Try seasoning some of your completed caramels (in chocolate or not) with sea salt.
-Wrap caramels in waxed paper.


Individually wrapped caramels placed in a nice decorative box make great gifts for friends, co-workers, or any special person in your life.

Saturday, December 11, 2010

Hard Candy


I was introduced to the art of making ‘hard candy’ by my good friend Karyn last Christmas… and it has become one of my signature holiday items!  Karyn deserves all the credit.  I say art- because make the candy at first appears simple… but it can be dangerous - so be careful!
This candy can be served in dishes around your house, bagged up and given along with holiday gifts, or placed in decorative boxes and given to friends and family.  Again- the beautiful colors make this a beautiful gift.

There aren’t a lot of steps to making the candy, so it really makes the toughest part about the flavoring.  Deciding what flavors to make is half the fun!
Here is what I think are the most traditional flavors to make:
·         Anise
·         Cinnamon
·         Spearmint
·         Wintergreen
My friends and I have also had some luck with the following flavors:
·         Tangerine
·         Vanilla Butternut
·         Watermelon
·         Blue Raspberry

Truth be told- it looks so pretty that even if no one liked to eat it, I would still make batches and batches every year!  Happy Candy Making!!


Hard Candy Recipe
Ingredients
·         2 c. sugar
·         2/3  c. light corn syrup
·         3/4  c. water
·         1/4  t. food coloring
·         1 dram flavoring oil*
*you can’t use flavoring extract- it must be oil*

Instructions
In a large saucepan (on the stove), mix together the sugar, water, and corn syrup.  Consistently stir over medium heat until all the sugar has dissolved.
Once sugar has dissolved, bring mixture to a boil over medium heat - and DO NOT STIR.
Place candy thermometer in your mixture.
Still- no stirring.
When syrup temperature reaches 260 degrees - add your desired food coloring.
Still- no stirring.  The boiling will mix in the food coloring.
Remove from heat at exactly 300 degrees.
Let the mix sit for 1-2 minutes while the boiling subsides.  Then add flavoring.  (stand back- when you add the oil there is a strongly scented steam that will be produced that can be dangerous to nose, mouth and eyes)
Stir in flavoring.
Quickly pour mixture into greased candy molds (or a greased cookie sheet w/ edge).  Mixture will harden very quickly, so you have to move fast.
Allow candy to sit for 2-3 hours.
When hard- break candy apart from the molds (or use a mallet to break about cookie sheet candy).
Candy can be served plain or dusted with powdered sugar or extra fine granulated sugar.
Place candy in your favorite dishes or gift boxes.


To order flavoring oils, candy molds, and much more - visit my favorite candy supply company on-line at www.lorannoils.com - they are reasonably priced and ship quickly so there is still time to make candy for this Christmas!


Extra Tip: Once you are done making this delicious candy, cleaning the dishes that are used to make the candy sometimes appears to be challenging.  Just soak in water for an hour… rinse… and repeat soaking.  The excess candy residue will dissolve off the dishes very easily if you are patient and just use hot water.